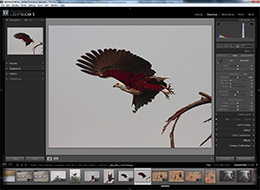
Moving from Adobe Bridge to Lightroom

I just spent literally the whole day reading Scott Kelby's Lightroom for Digital Photographers (now version 5). I had been thinking of moving to Lightroom for quite some time, but when I tried the demo a while back, my computer was too slow to handle the sort of non-destructive edits that made Lightroom useful. So when I got a new computer about a month ago, it was time to give the program another shot. And I'm glad I did!
For years I've been using a combination of Adobe Bridge plus Camera Raw plus Photoshop. I've been pretty happy with the combination, but there are limitations that I wish I didn't have to deal with. These are:
- A lot of the editing I do in Photoshop actually changes the image OR requires me to jump through hoops to make them non-destructive.
- Photoshop is really overkill for what I do. Some spot healing, rotation, and cropping didn't even come close to tapping into Photoshop's feature set so I'm adding a lot of unnecessary overhead to my workflow.
- Adobe Bridge had some image management features, but I wanted better ones that made it easier to find photos
- I also wanted more flexibility with exporting files with different dimensions and intended for different devices (screen vs. printer)
With Lightroom 5, most of my wishes have come true. White balance adjusting, color enhancing, sharpening, cropping, rotating, and spot healing are all available and all non-destructive. When I'm done post-processing a set of images I'm able to export all them to a folder with a file naming convention that auto-increments, dimensions of my choosing, and output sharpening specific to the image's final use.
Unfortunately, There are a few things that are missing both from Scott's book and from Lightroom:
- Scott covers cropping extensively, but misses one detail. Sometimes you want to use a fixed ratio portrait crop on a landscape photo. How you do this in Lightroom isn't readily apparent, but it can be done. After some digging around I learned that you just need to grab one of the crop anchors and move it until the crop rectangle “flips” and then you're good to go.
- Lightroom doesn't have any soft-proofing capabilities like Photoshop does. If you read the various posts on the web about this you'll get two points of view. The first is that you shouldn't need soft-proofing. The second is that Lightroom should have soft-proofing. I fall in the second camp and I'm not entirely sure what I'll end up doing to get the same results I was able to get with Photoshop.
- One big feature for Lightroom that would bring my use of Photoshop close to 0 is content-aware fill. That tool is incredible for removing distracting elements from my shots — there always seems to be a branch or blade of grass to distract from the main subject in my photos!
- And the last feature is more of a nice-to-have. Lightroom keeps a history of every action you take. This includes actions that don't result in any change or sets of actions that together don't result in a change e.g. doing something then undoing it. It would be cool if there was a way to clean the history of such unnecessary entries so that it'd be easier to work with the history list.
Other than the above, I'm quite happy to have made the switch today. Up next is exploring the plugins that are available to extend the existing functionality. I'm hoping to find something that makes it easier to generate galleries for this site with HTML code I can customize.


Leave a Reply