Group Bonsai Plantings
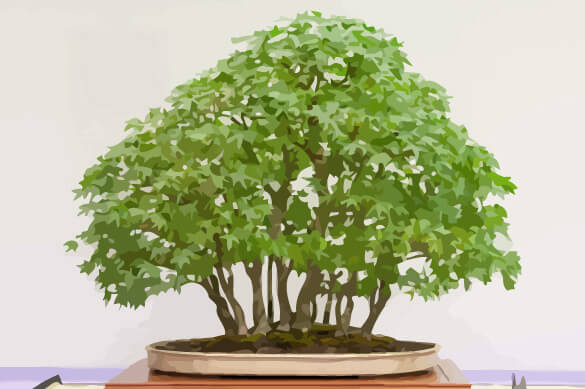
The natural beauty of a clump of trees, a woodland or a forest can be recreated with a group bonsai planting. Use this style also for trees that may not make good single specimens, such as young and slender trees or ones with few or one-sided growth of side branches.
Do not base your design on a photograph or another bonsai, but observe carefully the way trees grow in nature. In a group, a tree develops differently from a solitary specimen. Each tree has to compete for its share of light, water, and food, so it tends to grow upward rather than outward, developing a tall, slender trunk instead of a short, thick one. Only the branches of the outermost trees receive enough light to spread out well. Weaker and younger trees lean away from more dominant ones toward the sun.
Species for Group Plantings
Many species of evergreen and deciduous trees are suitable for group plantings, especially those that grow naturally upright. For a small to medium-sized group, choose trees with small leaves; use large-leaved and coarse-growing forms for bigger groups.
It is usually better to use trees of the same species; mixing, say, a wisteria, beech, cherry, and oak in one group never looks realistic. Scale is another problem when mixing species: a background tree with larger leaves than the foreground tree destroys the illusion of distance. Also, different species require different soil types, watering, and feeding.
Creating Perspective and Space
In a group planting, you must create an illusion of distance and space. Positioning tall trees at the front and smaller ones at the back gives a feeling of depth, even in a narrow container. Stagger the arrangement slightly, with two or three smaller groups, each diminishing in height. Keep the silhouette of the background trees simple, and the eye will register them as more distant than the elaborate trees placed in the foreground.
Arrange the trees asymmetrically, and keep the open spaces on either side of the container unequal in size. A large, shallow pot or a flat slab of slate or rock helps to recreate an effect of openness, so that you can feel that you could . walk between the trees.
Planting a Group
Ideal species for group planting are beech, birch, cedar, cryptomeria, elm, hornbeam, juniper, larch, maples, and spruce. It is often necessary to grow the maples, elms, and cryptomeria species from seedlings or cuttings, before you prune them into a more slender, upright shape than a single bonsai would require.
To make any group look natural, you should use an odd number of trees. Remember that you will need more trees to choose from than you will actually use. After root pruning each tree, work out a rough arrangement for the group. Select a large enough pot for your chosen group, and cover its drainage holes. Put a shallow layer of grit in the pot, and cover this with a layer of potting soil.
Step-By-Step
- Take the first tree out of its training pot. Comb out the roots carefully with a root hook, and trim them to fit the pot with large-handled shears. Repeat this process on each of the other trees.
- Decide on the front view of the tallest tree. When planting the tree in the prepared pot, position the tree nearest the viewer, toward the front of the container, and a third away from one side.
- Choose a shorter and thinner tree. Place it close to the first tree, allowing it to lean slightly away from the taller one, as if it is seeking the light.
- Set the third tree on the opposite side of the central tree, and position it slightly back in the container. Vary the spacing between the central and the ones on either side of it, to make the ping look natural.
- To increase the illusion of perspective, position the fourth, thinner-trunked tree at the back of the pot. Set the fifth tree at the extreme right of the group, so that it is leaning away slightly from the other trees.
- Remove crossing branches and downward shoots with scissors or shears to open up the structure.
- For a balanced silhouette and also to let in more light, groom the foliage as necessary.
- Water the soil well. Add fresh moss, using a spatula to settle it firmly in place.


Leave a Reply