Best Parts For DIY Standing Desk
Sedentive (inactive) lifestyle is a global issue of the 21st century. Obesity, joint problems, sagginess of muscles, bad blood circulation, nearsightedness – all this and more is the very real and probable, bitter result of desk work. One of the best ways to save your health for years to come is the organization of an ergonomic work space, adaptable to the certain person's stature features.
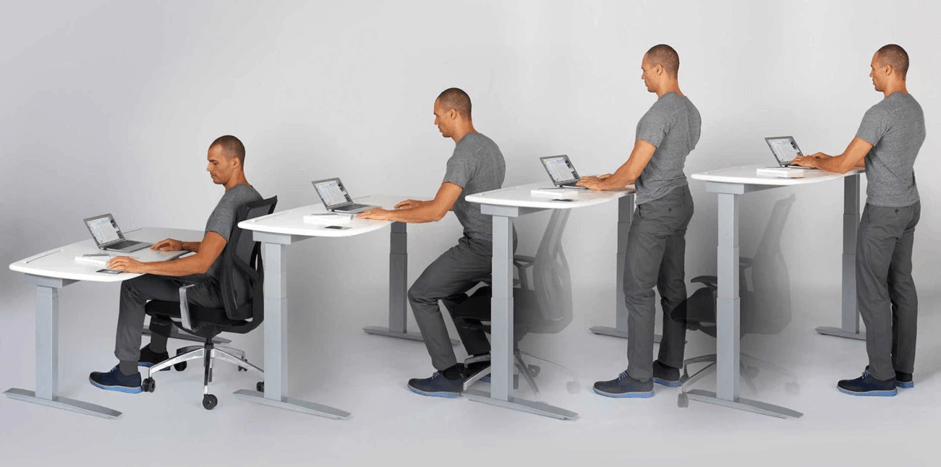
The table, especially adjusted to the height of your body in the sitting position, means the proper neck situation, straight back, relaxed shoulders, and optimal legs position. The only disadvantage of automated standing desks is their price. Most models, in the development of which professional orthopaedists took part, start at $500-600. Double that amount if you're looking at the designer item.
Fortunately, you may as well accessibly make your own adjustable model single-handedly. Especially considering that the most complex element – linear actuator – mustn't be constructed manually nowadays. Let's discuss how the standing desk is built and which details are required for that.
Building a DIY standing desk: how it's done
Let's take a look at the list of components to be included in the construction of the future desk:
- solid wood (pine, oak, nutwood, cherry, ashtree, teak, beech) – it will be used to build the tabletop and legs;
- two identical linear actuators for table legs;
- AC power supply (power – 12V will be quite enough for domestic linear actuators);
- wires to connect actuators to the power supply and a wall plug;
- drywall screws or screws;
- polyvinyl-acetate adhesive for wood;
- set of tools (saw, drill, pliers, nippers, staple gun).
All set? Then let's get to work.
Making a DIY standing desk: 5 simple steps
Follow the next 5 simple steps to create your own personal handmade automated standing desk. All you need is a bit of time, patience, and effort.
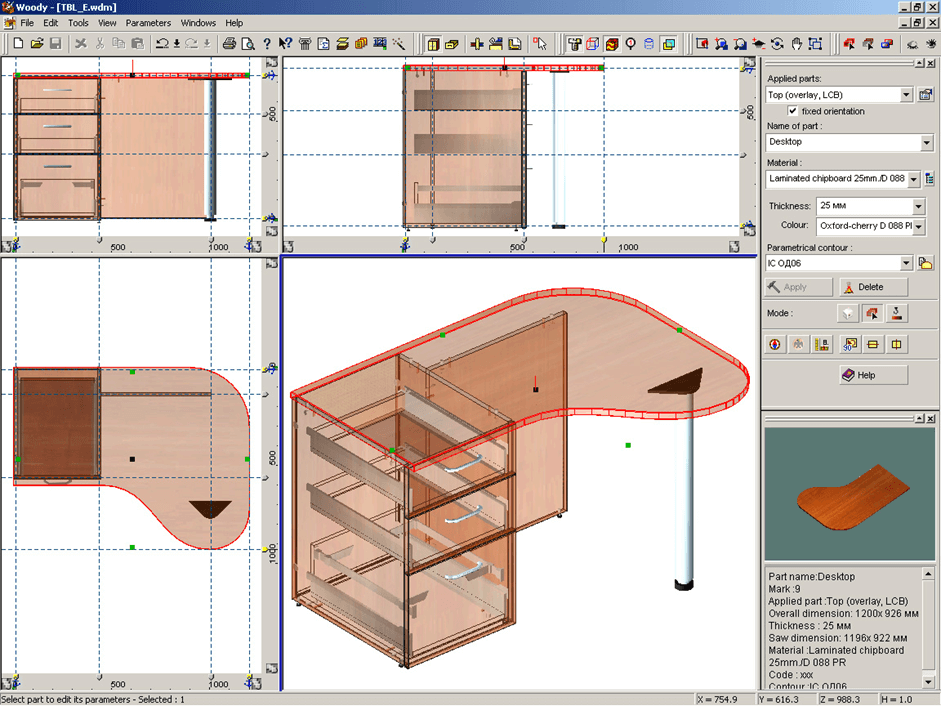
Step 1: creating the design in the specialized app
It isn't difficult to design the appearance of your future table in the times when numerous resources enthusiastically dedicated to the interior design are publicly available. All you need is the special software to help you visualize your ideas. There are various applications that help modeling furniture in 3D and adjusting the tiniest details of the design and physical dimensions of a certain model. Among the most renowned examples of such software are Woody, SketchUp , and WoodDesigner.
Step 2: building the standing parts
Once all of the wooden parts are cut out, it's time to assemble them. Start with the support. First, connect a linear actuator with the wooden base. Then, cover it with four wooden billets interconnected with the help of glue. Repeat that twice.
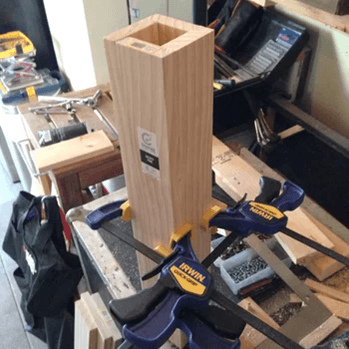
Build wooden legs, make them wider so that they fit the previous wooden part with an actuator. Put the tabletop over the legs. Make sure actuators are working and moving everything up and down smoothly.
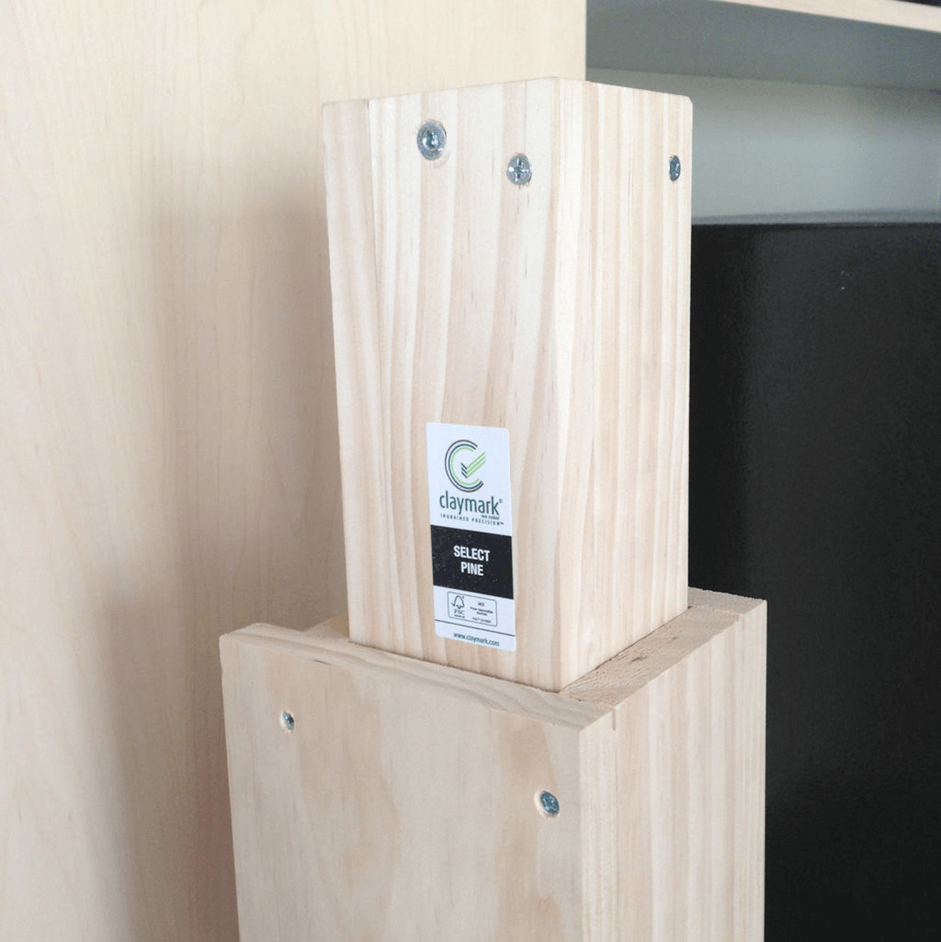
Step 3: attaching tabletop to legs
It's best to attach the legs to the tabletop with the help of drywall screws. Screws, in general, are the best way to bolt two part in the perpendicular situation. On the other hand, if separate parts of your table are made of wood laminate or other more fragile materials instead of the solid wood, it's better to use the special polyvinyl-acetate glue for wood.
Step 4: securing a power adapter and connecting wiring
At this stage, you will need to secure power adapters and provide a wiring for them. Choose the most optimal wire length depending on your particular situation. Make sure the organized wires don't bend and rub against furniture too much – the more it is static, the better. Special cable binders and straps can help you avoid the twisting and spoilage of brass conductors.
Step 5: Testing the result
Try to check how efficiently your automated table performs. A regular domestic actuator fully lifts the tabletop in about 30 seconds on average.
As a result, you get the standing desk, the retail analog to which starts at $500 for about $200! A very profitable alternative to take care of health indeed.

Conclusion
Congratulations, your automated desktop is absolutely ready for use! We hope very much that our small guide inspires you to create your own standing desk. It's not that difficult to handle as you can see, especially, considering the fact that you can use most various items as parts for building it. The main thing here is to select the reliable actuator, which won't break down into a few months of use.
839GYLCCC1992

Leave a Reply