

8 Simple Things To Plan Before Building A Garage
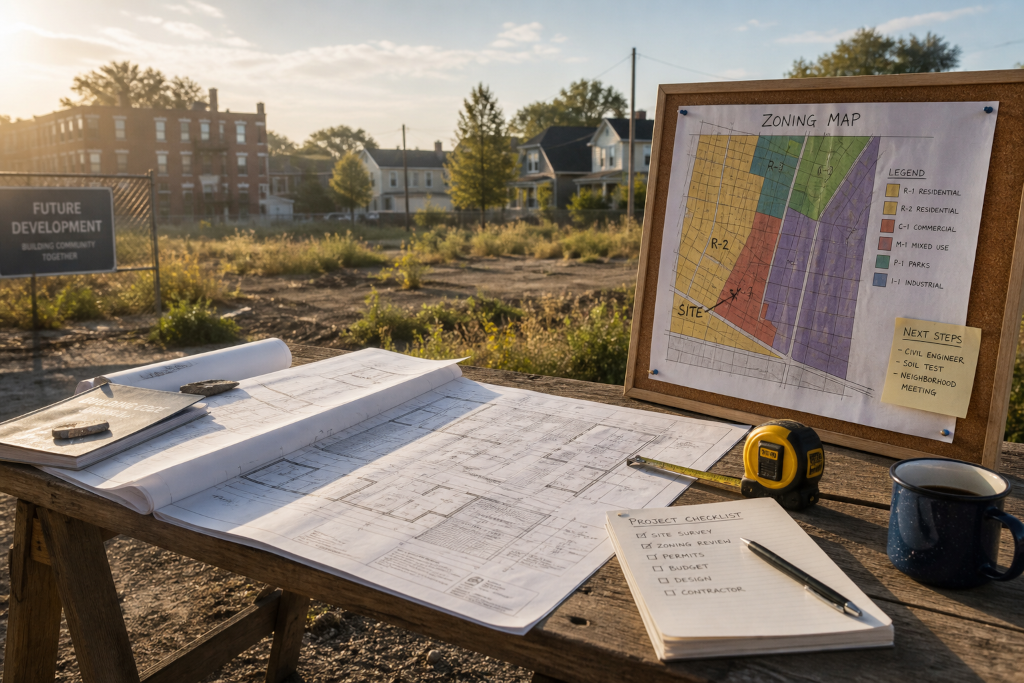
Garage regrets are rarely about paint color or door hardware. They are about a ceiling framed six inches too low for a lift, a slab that cannot hold the equipment sitting on it, or a building with no usable power because trenching was too expensive to add later.
Every one of those problems is a decision made or skipped before the concrete was poured. The eight items below are the planning decisions that close those gaps on paper where changes are still free.
1. Pull Permits And Check Local Rules
Pull the local zoning ordinance and permit requirements before a single dimension is sketched instead of waiting until later. An unpermitted permanent structure complicates insurance claims and flags during a property sale, which delays or prevents the transaction. Detached garage planning starts with what the municipality actually allows rather than what seems reasonable.
Setbacks define the minimum distance from property lines, easements, and the main dwelling while varying significantly by jurisdiction. Extending utilities to a detached structure often triggers secondary trenching permits and specialized municipal inspections.
Builders sometimes bypass these complex utility approvals by powering their tools and lighting with a Jackery solar generator for backup power from Off-Grid Source to keep the project off-grid. If you do pursue permanent utilities, check local fire codes because they dictate permitted use types and cap total square footage.
2. Plan The Slab For Heavy Loads
A standard residential slab poured at four inches handles parked vehicles and light storage. It is not rated for heavy equipment, so a six-inch slab with rebar reinforcement and engineered footings becomes the practical baseline for hydraulic presses or loaded trucks. Many jurisdictions require engineer-stamped drawings for slabs supporting heavy anchor loads before approving the build.
Load concentration is a detail many builders underestimate during the planning phase. A vehicle hoist transfers its entire rated capacity through two anchor points, which means the concrete directly under those points carries the full load. Under-slab plumbing, conduit sleeves, and anchor embedments require placement before the pour because adding them afterward means breaking finished concrete.
| Important: A two-post lift concentrates its entire rated capacity through two anchor points. Under-slab plumbing, conduit sleeves, and anchor embedments must be planned before the pour; adding them later means breaking finished concrete. |
3. Frame Ceiling Height For Vehicle Lifts
The most expensive discovery in a new garage build is a ceiling framed at ten feet that cannot accommodate a full-rise vehicle lift. Most entry-level two-post units require a minimum of twelve feet of clear height measured to the lowest obstruction like a beam soffit or an HVAC unit. A four-post storage hoist with a lower rise profile might fit a tighter space, but that specification needs confirmation before framing begins.
The requirements vary by model and lift type, so browsing HeavyLift Direct's sturdy Atlas car lifts before framing shows exactly what the slab and ceiling must deliver. Manufacturers publish minimum ceiling clearance and anchor-point load ratings on those product pages to guide structural planning.
If heavy equipment is even a remote possibility later, frame for it today since adding height after the wall plates are set requires replacing plates and re-roofing the affected section.
| Key Insight: Most two-post lifts require 11 to 12 feet of clear height measured to the lowest obstruction, not the roof peak. Frame for a potential lift now; adding height later costs several times the initial framing upcharge. |
4. Size Door Width And Height Appropriately
Standard single garage doors run nine feet wide and seven feet tall, but that opening fails to clear many cargo vans or vehicles carrying ladder racks. A ten-foot-wide door serves as a practical minimum for a full-size pickup. Planning for a nine-foot height clears most work trucks and taller SUVs with space to spare.
Measure the widest and tallest vehicle in the current fleet before adding a margin for future purchases. Door rough openings are set when the walls go up, and widening one later requires replacing the structural header. That structural demolition costs considerably more than installing a wider header initially.
5. Map Out The Electrical Power Strategy
Running a sub-panel from the main house requires trenching, conduit, and an electrician's schedule. For a detached garage sitting far from the main panel, that utility work frequently costs thousands of dollars depending on distance and soil type. Digging through clay soil at sixty feet represents a fundamentally different budget conversation than running through sandy ground at fifteen feet.
For a workspace running LED lighting, a mid-size compressor on intermittent duty, and corded hand tools, portable solar stations with a panel array serve as a legitimate alternative. A robust off-grid battery setup powers standard shop tasks without a trenching permit or an expensive visit from an electrician. Sizing an independent system properly requires pulling capacity specs and comparing them directly against the actual electrical draw of your specific tools.
This trench-free approach suits moderate and intermittent electrical loads perfectly. A full sub-panel remains the correct choice for welders, industrial compressors, or high-draw machinery running continuous duty cycles. Evaluating your workflow category before the build begins determines whether that expensive utility trench is optional or mandatory.
| Pro Tip: For moderate, intermittent loads LED lighting, a mid-size compressor, and corded tools a correctly sized solar generator can eliminate trenching permits and electrician scheduling. Compare its capacity rating against your actual workshop draw before committing. |
6. Install Proper Insulation And Ventilation
A space used year-round without proper thermal barriers becomes an oven in July and a freezer in January. Portable heaters or window units cannot compensate for an uninsulated exterior shell. Deciding between spray foam on the roof deck and batt insulation in the stud cavities must happen before drywall goes up, because adding either later requires tearing finish materials back out.
Dedicated ventilation handles fumes, humidity, and heat buildup from active engines or chemical solvents. Planning at least one operable window and adding a through-wall exhaust fan is essential if any finishing, coating, or automotive work will happen inside. Roughing in those exhaust pathways during the framing stage saves significant time compared to cutting through finished exterior siding.
7. Design Lighting Around The Work
A single overhead fixture centered on the ceiling creates shadows exactly where they are least useful, like under an open hood or along the face of a workbench. A functional lighting layout positions drops centered over each vehicle bay. Including under-cabinet fixtures along the bench and a dedicated circuit for an inspection cord near the heavy equipment area provides task illumination where it actually matters.
Basic LED shop strip fixtures remain relatively inexpensive, but fixing a poorly planned wiring layout gets costly after the walls are closed. Planning electrical circuit runs before drywall allows you to rough in junction boxes while the structural framing is still open. Repositioning a box after the final finish is a minor job, while rewiring a primary circuit buried in a finished wall takes significant demolition.
8. Map Out Water And Floor Drainage
A central floor drain makes active wash-downs and accidental spills manageable instead of destructive to the concrete surface. The outflow must connect to a municipal sewer, a permitted holding tank, or an approved dry well depending on local building codes.
Adding a utility sink requires a supply line and a dedicated drain, and both of those pipes must run under the slab if they sit inside the building's footprint.
Planning interior drainage early requires just one trench, a single inspection, and one concrete pour. Adding these plumbing elements after the slab cures means breaking up the solid floor, repouring new cement, and scheduling a secondary inspection. These plumbing runs are relatively simple systems to install, but they are difficult to retrofit cheaply once the foundation sets.
The Bottom Line
Several construction elements become genuinely permanent after the concrete foundation sets. Slab thickness, structural reinforcement, under-slab conduit, and the wall-plate height that dictates your ultimate ceiling clearance cannot be easily altered.
The required slab rating and clear ceiling height for automotive lift installations must be finalized before framing begins, because those specifications determine whether the building can safely handle heavy maintenance work.
Deciding between traditional grid conduit and an off-grid solar generator setup also locks in early, since running underground electrical lines after the pour requires breaking into finished concrete on both ends. Door rough openings and lighting circuit locations can technically be changed later, but altering them requires substantial demolition.
839GYLCCC1992

Leave a Reply