A Road Bike Fitting Will Maximize Performance and Comfort
Table of Contents
Bicycle fitting is much more complicated than one would think. To be a certified bike fitter, yes, there is such a certification, you need to take courses, complete practical hours, and pass tests. Most bike fitters are also experts in kinesiology and biomechanics. But before you dish out money for a professional bike fit ask for the employee's credentials. A professional bike fit can cost up to $250.
Most new riders just get on a bike and start riding. And if you're just a weekend park rider, this may be fine. But if you cover significant distances then the consequences of a poor fit can not only mean a big difference in comfort, but also in avoiding or causing injuries.
There's absolutely no way you can learn all the ins and outs of biking fitting from the Internet. However, in this article I'll try and cover some of the basics. My focus will be for road bikes. Mountain bike fitting is an entirely different story and would greatly depend on the bike you have and the type of mountain biking you do.
Frame Size
Without the proper frame size everything else becomes quite difficult. So when selecting a bike, start with the frame fize.
For safety, the first aspect you should consider is crotch clearance. While off the saddle, with both of your feet on the ground, make sure there is at least 2-3 cm clearance between the top tube and your crotch.
Suggested Measurements for Men/Unisex:
Rider Height = Frame Size
- 148-152 cm = 47-48 cm
- 152-160 cm = 49-50 cm
- 160-168 cm = 51-53 cm
- 168-175 cm = 54-55 cm
- 175-183 cm = 56-58 cm
- 183-191 cm = 58-60 cm
- 191-198 cm = 61-63 cm
Women tend to have a narrower shoulders and a shorter reach, so the sizes are a bit different than those for men. Of course, there is no reason why a woman can't ride a men's frame or a unisex bike if it fits her.
Suggested Measurements for Women:
Rider Height = Frame Size
- 147-155 cm = 44-46 cm
- 155-160 cm = 47-49 cm
- 160-165 cm = 50-52 cm
- 165-172 cm = 53-55 cm
- 172-180 cm = 56-57 cm
These charts were obtained from Evans Cycle.
The above measurements should be used as guidelines only especially if you have disproportionately longer legs or arms. So, get on the bike before you buy it and make sure it's comfortable. If you can, ask the store to let you ride it on a trainer first. Try to imagine being in this position for a couple of hours and not just a few minutes.
Before getting diving into the other aspects if bike fitting, set up the bike on level ground and lean it against the wall or put it on your bike trainer, but make sure the front wheel is raised to the exact same level as the back wheel. Next, put on your cycling shoes or the shoes you wear when you're riding.
Saddle
If your saddle is not in the proper position you risk lower power output, knee strain, back strain, and discomfort. Aside from saddle positioning, make sure you find a saddle that ‘fits' your sitting area. It is very common for new riders to go for the largest and softest saddle possible, but this is not usually the best choice. Ask at the store if you can try a few saddles first before you buy.
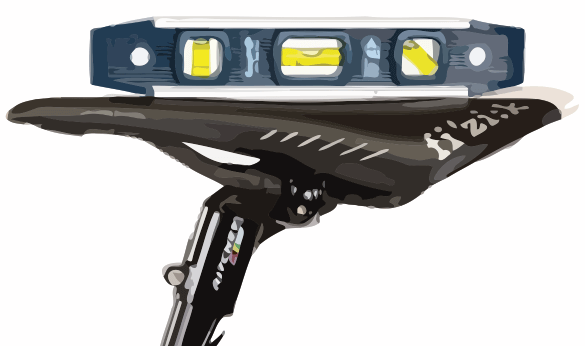
Level: The top part of the saddle should be level with the ground. If you have a leveling tool, use it. If the seat is not level you will get sore and/or you will feel like you're sliding off the seat.
Lateral Position (fore/aft):
If your saddle is too far forward you will not be able to get maximum power from your stroke, plus you might experience knee pain.
- Option #1: Adjust the seat so the two metal rails are clamped right in the middle. This should only need altering if you have a bike too small or too large. Otherwise, stick with the middle.
- Option #2: While wearing your bike shoes get on the bike and put one foot on a pedal and place that pedal in the most forward position. If you now hang a string from the front of your knee it should end up just behind the toes.
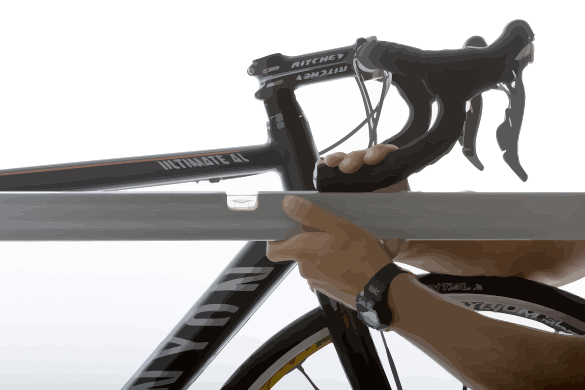
- Option #3: Place an elbow on the tip of the saddle and your straightened fingers on the handle bars. Your fingers should barely touch. This method will not work if you have the wrong frame size or your arms are shorter than average.
When you are adjusting the fore/aft be careful not to alter the levelling of the seat I just discussed above.
Height: This will be adjusted with the seat post clamp or by adding/removing spacers. You may need to play with this a bit to get the right height. Get on your bike while wearing your bike shoes, but do not clip your shoes into the pedals. Place the heel of your left foot on the pedal surface while the pedal is in the lowest possible position. While in this position the leg should be perfectly straight. So when you clip your shoe in the pedal and/or when the ball of your foot is positioned on the pedal, there will be a slight bend and it will never totally straighten out.
 Handlebars should be shoulder width
While you are making this adjustment make sure that your hips are kept square, there should not be any leaning to one side or the other. If you change shoes, or pedals, you may need to readjust the saddle height.
Handle Bars
Ideally, the widest part of your shoulders should match the width of the bars. It might be tempting to use narrower bars to be more dynamic, but this can cause shoulder discomfort, poor bike handling, and difficulty breathing (inflating your lungs). Bars are usually measured from one end to the other, and they come in sizes ranging from 36 cm to 46 cm. If in doubt, go with larger bars.
The handle bars should be rotated so the bottom drops are parallel with the ground. And, the tip of the bar hoods should be slightly higher with the top part of the bars. Too low and your hands may slip off. Too far back and you will not be aerodynamic.
Handle Bar Stem
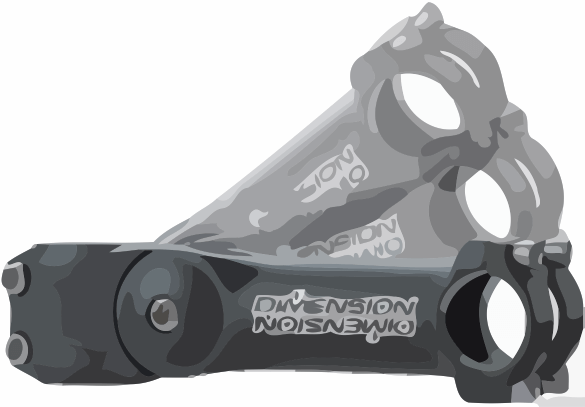
This is the one part that relies mostly on feel and comfort. If you are a new or recreational rider you will probably choose the stem to be at the same height as the seat, or slightly higher. If you are more competitive you will most likely prefer to lower the stem. Pros usually ride so the stem is about 6-7 cm below the saddle. Whatever you choose, make sure your neck is not strained; your arms are slightly bent and comfortable to absorb shock; and shoulders should be a bit dropped. If after a few minutes of riding you start to feel discomfort then you may want to re-look at this. If you alter your riding style consider an adjustable stem such as this shown below.
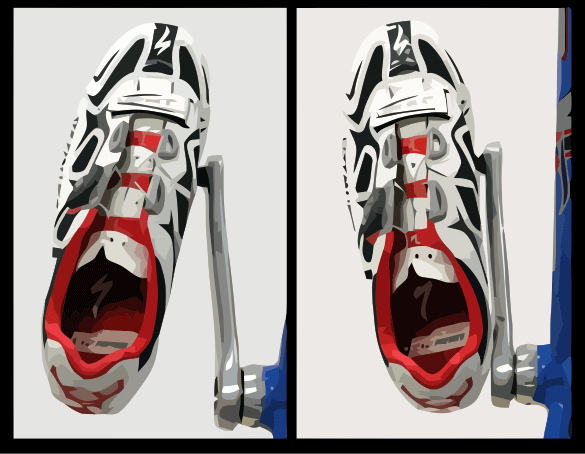
 Align cleats so the widest part of your foot is over the spindle
Cleats
Longitudinal Adjustment
Cleats connect to the bottom of your bike shoes so that your shoes ‘lock' into the pedals. The cleats should be positioned so the widest part of the foot is directly over the axle of the pedal (see diagram at right). This is true regardless of the type of shoes, cleats, or pedals you use. Too far forward or back will reduce power output and possibly cause ankle or knee strain.
 The left will most likely cause knee pain, the right will obviously hit the crank arm.
Rotational Adjustment
First, make sure the inside of your shoe doesn't touch the crankarm. Beyond that the rotation position is largely a personal choice. Most riders like to have the toes slightly pointed outwards, as this is the most natural when the knees bend. But, don't force your legs to follow an unnatural bending motion for you.
For example, if someone has a hip injury they may prefer the toes to be more pointed outwards. It is also possible that the positioning is not identical for both feet. Go for a short ride with your tools and try adjusting this angle until you find what works for you. If you've never used cleats before, first ride without cleats and pay attention to how your feet sit on the pedals e.g. toes out, toes in, neutral and then use this to guide your cleat adjustments.
While the DIY approach to bike fitting probably won't get you to where a professional with years of experience will, you'll certainly better off than the vast majority of riders. Spending a little extra time up front will yield months if not years of benefits!


Leave a Reply