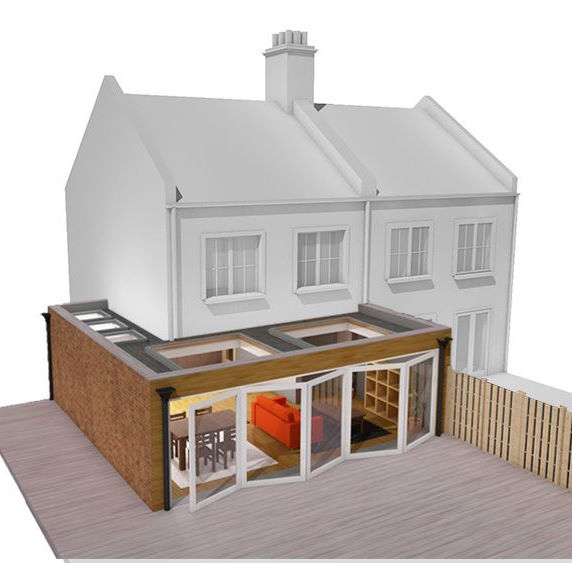
7 Key Steps to Adding an Extension to Your Home

So, you're thinking about adding an extension to your home? Brilliant choice! Whether it's a larger kitchen, a new bedroom, or even a home office, an extension can completely transform your space. But before you grab a sledgehammer, there's a bit of planning to do. Let's walk through the steps to make sure your extension project goes smoothly, stays on budget, and ends with a space you'll love.
Step 1: Figure Out What You Really Need
Let's start with the big question: Why do you want this extension? Is it to create a more open living area for family time? Maybe you need an extra bedroom now that the kids are growing, or perhaps you're working from home and dreaming of a quiet office. Whatever it is, be clear about your goals. This clarity helps when you're working with architects, builders, or anyone else involved in the project. Think about how the extension will fit into your home and lifestyle. Will it flow naturally with your existing layout? Asking these questions upfront will save you headaches later.
Step 2: Check Those Planning Rules
Before you get carried away with Pinterest boards and mood lighting, stop. You need to make sure your dream extension is actually allowed. Every area has planning regulations, and ignoring them could lead to some very expensive problems down the line. Some projects don't need planning permission (that's called permitted development), but larger builds probably will. If your property is in a conservation area or listed, expect stricter rules. Don't guess—check! Reach out to your local council or get advice from a professional. It's a boring step, but trust me, it's one you don't want to skip.
Step 3: Sort Out Rubbish Removal
This one's easy to overlook, but trust me, the rubbish will pile up fast once construction begins. Old materials, offcuts, and general debris will take over if you're not prepared. Sorting out a large dumpster rental is a lifesaver. It gives you a dedicated spot to toss everything, keeping the site tidy and safe. Plus, it saves you from countless trips to the local tip. Make sure you pick the right size—bigger is better if you're unsure—and schedule a pick-up for when it's full. Pro tip: Have it placed somewhere convenient but out of the way to avoid annoying your neighbours!
Step 4: Get Real About Your Budget
Let's talk money. Extensions can be pricey, but they don't have to break the bank—if you plan properly. Start by listing all the costs you can think of: design fees, permits, materials, labour, and a little extra for those “uh-oh” moments (because they'll happen). Be realistic about what you can afford and try to stick to your budget once it's set. If you're tempted to cut corners, remember that cheap materials or unqualified builders can cost you more in the long run. The key here is balance: get good quality where it matters most, and save where you can.
Step 5: Find the Right Team
Now, unless you're planning to DIY the whole thing (and let's be honest, most of us aren't), you'll need to hire some pros. Depending on your project, this might include architects, builders, and even specialist tradespeople. Don't just go with the first option you find—do your homework. Look for people with experience in similar projects, read reviews, and ask for recommendations. A great team will not only get the job done but also help you navigate the tricky parts, like regulations and structural requirements. Don't be shy about asking questions—they're working for you, after all.
Step 6: Brace for a Bit of Chaos
Here's the thing: building an extension isn't exactly a quiet or tidy process. Your home will feel like a construction site for a while, and there's no avoiding some disruption. The good news is you can plan for it. If your kitchen's being renovated, set up a mini cooking station somewhere else. If the work gets noisy, make sure you've got a good set of headphones (or an excuse to escape for the day). Pets and kids? Keep them well away from the building zone—it's safer for everyone. The more prepared you are, the less stressful it'll be.
Step 7: Add the Personal Touches
The major work is done—time to make it feel like home. This is the fun part! Paint colours, flooring, lighting, furniture… these little details will bring your vision to life. Think about how the new space connects to the rest of your home. Do you want a seamless blend or a bold contrast? If you're stuck for ideas, look for inspiration online or consult an interior designer. Don't forget to think long-term: energy-efficient lighting and good insulation can save you money and make the space more comfortable. This is your chance to really make the extension yours.
Ready to Transform Your Space?
Adding an extension isn't just about more space—it's about creating a home that works better for you. By taking the time to plan, budget, and prepare, you'll set yourself up for a successful project. Yes, there might be a few bumps along the way, but the result will be worth it. So, whether you're dreaming of a brighter kitchen, a new bedroom, or just more room to breathe, follow these steps, stay organised, and enjoy the process. Soon, you'll have a home that's not just bigger, but better suited to your life.
839GYLCCC1992


Leave a Reply