Using the Right Torque For Bike Repair and Maintenance
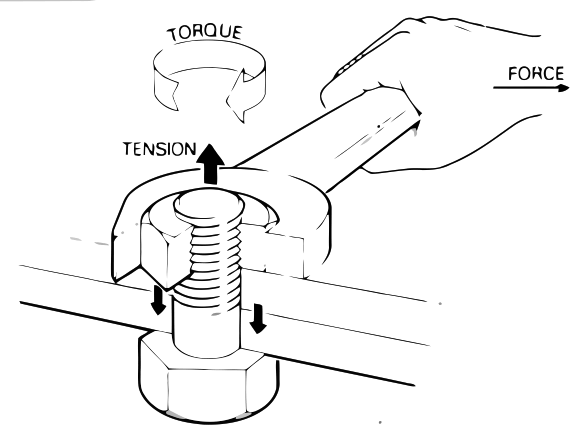
The diagram is as good an explanation of torque as I've seen. In the world of bicycle maintenance, torque is how much force is exerted to tighten a screw or a bolt. Most home mechanics just go by ‘feel'. Even many shop mechanics go by ‘feel'. However, it has been shown that guessing rarely obtains the ideal torque.
By not tightening to the correct torque you risk that that a the component or accessory will come loose. This can happen over time or very quickly such as brake cable pincher screws not holding onto the cable during a sudden stop. This looseness can happen because a screw is loose from under torquing or from the threads being damaged/stripped, and not holding properly, from over torquing. Damaged or stripped threads may not be obvious when you first install a part and will only become apparent when that part is under stress.
Besides tightening to the correct torque, also forcefully test the repair e.g. engage the brakes forcefully and make sure the cables don't slip. Or, for example, put downward force on the handlebars (more important for road bikes) and see if they hold.
Before I continue, note that torque can be measured in Nm (Newton meters); in-lb (inch pounds); or in ft-lb (feet pounds). To convert between units, use the following formulas:
- in-lb = ft-lb x 12; ft-lb = in-lb / 12
- in-lb = Nm x 8,851; Nm = in-lb / 8.851
- in-lb = kgf-cm x 0.87; kgf-cm = in-lb / 0.87
Example: 9.9 Nm x 8.851 equals 80 in-lb or 6.7 ft-lb.
In order to know what the torque is for a specific bicycle part you need to refer to the manufacturer's recommendations. Sometimes this is written on the actual part or in the literature you are given when you purchase the bike. Alternatively, you can probably find the right value on the internet. Be careful about making assumptions. Not all manufacturers will recommend the same torque for the same part. For example, a Shimano brake lever torque will be different than an SRAM brake lever torque. There are also differences between lever models from the same manufacturer. You will always be given a range for the torque such as 175 – 250 in-lb. Because torque wrenches have an error value, especially when you are close to the desired number, it is a good idea to tighten to the middle of the range given.
To obtain the correct torque you need the right tools. Basically, a torque wrench. For cycling there are two basic types of torque wrenches that are ideal: a beam wrench and a click type wrench.
A beam wrench is the easiest to use. You look at the moving dial and when it reaches the desired number you have reached the correct torque. The beam wrench is less expensive and easier to calibrate-just move the dial by hand if it's not at zero when there is no torque. However, you must be looking at the dial, which can sometimes be difficult depending on the angle you're holding it.
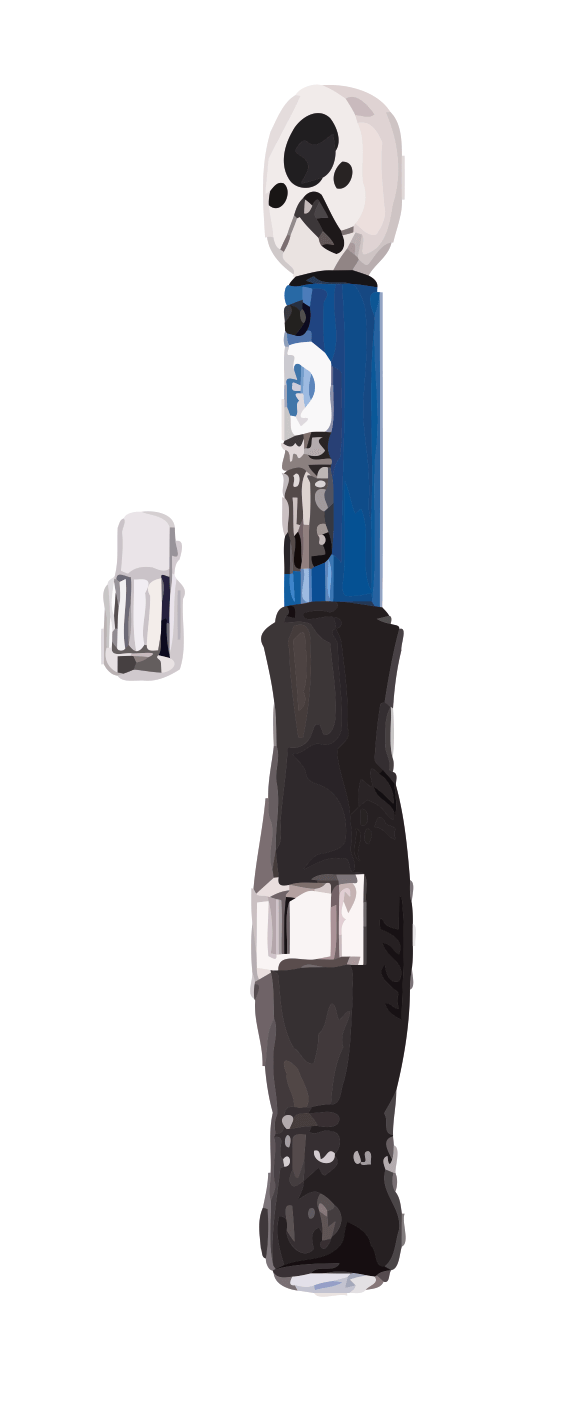
A click type wrench has a setting dial and looks very much like a ratchet. As you tighten, once you reach the correct torque, it will click. You will hear the click and you will feel it if you are tightening slow enough. The main advantage of this wrench type is that you don't need to be looking at the dial while tightening. However, they are more expensive and must be sent to the manufacturer for recalibration if needed. Also, there is no easy way to know if they need calibration.
The most important bicycle components to tighten with the correct torque are your brakes. Specifically, the screws holding the levers onto the handlebars; the screws securing the brakes onto the bicycle frame; the screws securing the brake pads; and also the brake cable pinchers. If one of these fails the entire braking system will fail. As they say, a chain is only as strong as its weakest link.
Other components to consider tightening to the correct torque include:
- The seat post clamp so the seat doesn't slide down or rotate unexpectedly.
- The bolts securing the actual saddle onto the top of the seat post.
- Chainrings onto the spider.
- Crankarms onto the chainrings.
- Bottom bracket.
- Rear hub.
- Pedals: Even though these will tighten as you pedal, if you have just installed a new pedal and do not tighten properly, there will be a ‘slip' the first time you put pressure on it. If you are not careful you might end up on the ground from this.
- Gear cable pinchers.
- Derailleurs including the screws holding them onto the frame, or drop-outs, and cable pinchers.
- Handlebar stem. Depending on the type, there may be as many as 5 screws/bolts to tighten. This is to prevent rotation, which can result in your front wheel not being aligned with the rest of the bike.
- Handlebars, where they connect onto the stem. On a road or a triathlon bike if these are loose they will give when you apply downward force which could result in a nasty crash.
- Handlebar ends on straight handlebars. Believe it or not these are not recommended because they come loose with enough downward force, such as when standing up to climb a hill. However, if you do decide to install them make sure they are the correct diameter for your handlebars and torque them properly.
- Wheel axle skewer bolts, if not quick release.
A special note on quick release mechanisms: Obviously a torque wrench cannot be used for these. The general rule of thumb is that once you reach 90 degrees there should be enough force to cause you to have to push harder. By the time it reaches the closing point you should not be able to tighten any more. Make sure the quick release handle is close to the frame/fork so that it will not be knocked loose by accident by another object.

Leave a Reply